Showing posts with label diy. Show all posts

Monday, 23 July 2012

Patterns


My friend gave me a belated birthday present a few weeks ago, and I decided to try it out today. She gave me a kit to customise a mug which I think was from Paperchase. She didn't tell me, but I saw one in there the other day, but can't find it on the website if you want to get one. I love how she got me something crafty to do, I love presents like that! I thought up a few patterns to draw on it but was too scared to actually do them! So I bought some other plain white mugs to use for practice, which is the one you see above.

I'd seen this pattern somewhere before ages ago but I can't remember where, and decided to recreate it. Now I don't have a steady hand at all, so my lines were thick and wobbly which hopefully adds to it! And drawing on a mug wasn't as easy as I thought it would be, but it wasn't too bad. I can't wait to add to this collection, and the pen that comes with the mug is supposedly dishwasher safe after 72 hours. However I don't have a dishwasher so I won't know if that works!

If you don't have a kit or fancy getting one, Elsie at A Beautiful Mess gives some tips to draw on your mugs with sharpies which I'll definitely try out for different colours, you put them in the oven to set the pattern and then you have to wash everything by hand. If you attempt or have attepted to draw on mugs, plates, bowls or whatever let me know, I like checking out things like that :)

Hope everyone has a lovely week, looks like the Sun has decided to visit us so enjoy it while it lasts!

Thursday, 12 July 2012

DIY Disasters


Oh my days I am having some problems with spray paint! I thought it would be easy, turns out its not! I bought some spray paint off ebay thinking I could do some American type shorts, plain stars and Union jack shorts but there were lots of problems. With the cans, the problem was that the second time I went to use them above, the blue ran out! That's how much I got on the shorts, it's ridiculous! I had used them on the shorts below (and a bit on paper to keep the pressure even) but that is such a stupid small amount for almost £7! Now the shorts are kinda ruined unless I find some fabric paint as dyeing them with dylon wash dye won't really work. I definitely wouldn't recommend the sprays I linked to! I know they're meant for kids but I thought I'd at least get a few goes out of them. I'm too scared to use the red in case that runs out too since I used more of that the first time. And I spent ages cutting out stars and making sure none of the spray would go where I wouldn't because of the disaster below, and it was all for nothing.


As for the pair above, that was my own fault. I used cardboard for the stars which worked perfectly, and for the stripes I just used clear tape. But my table was on a bit of a slant, and the red paint was really runny and so my stripes were aweful, and barely there and such a mess. So I decided to just spray the whole half of it red and maybe try to work it out later (I haven't touched them since though), and the red bled through to the back of the shorts since it ran so much, and that's why the first photo there was cardboard everywhere! Sigh.  They look okay from the front, but the back has a small patch and the sides over the seam. Anyway, I thought I'd share a few of my DIY disasters with DIYing shorts, as I seem to can't get these right!

I'd also like to say thanks to all my new followers, I now have 20! I know its such a small number compared to other blogs, but to me it feels like loads, so thanks for following me! :) Also, as another thanks don't forget to enter my giveaway. Only five people have entered so the odds for winning are really high! And on another note, I'm slowly catching up with blog reading and general internet life, it's taking forever! Every time I think I've nearly caught up on my blog reading, there's a whole new batch of them to read! Does anyone else have that problem?

Wednesday, 20 June 2012

DIY Dip Dye Shorts


6 litres of warm water in a bowl, rubber gloves, a measuring jug with 500ml of warm water, damp shorts, dye and 250g of salt
I've been making some dip dye shorts whenever the weather is nice enough, since I want to make them outside, it kind of needs to not rain! It's simple enough to do and really fun! I want to experiment with more dye and more shorts! Above is a photo of what you need, and I'll list the steps below. Also just to be careful wear old clothes you don't mind getting stained, but I've done this twice now and haven't stained any of my old clothes, but knowing how clumsy I am I won't take the risk of wearing my usual clothes!


I followed the instructions on the back of the dye packet except for weighing my material, I've just dipped two pairs of shorts into the dye and it's worked. I also dipped the shorts into water and squeezed the excess water out so that they were damp before I started, but I will be using a spray bottle in the future.. For step one you need to add the dye to 500ml of warm water. I used an old measuring jug so it doesn't matter if it stains and mixed the dye in using my hand and a rubber glove but you could probably use a spoon or something else instead. 


Step two needs you to add the 250g of salt to the 6 litres of warm water and mix in till it gets nice and cloudy. 


For step three you then add in the dye.


I mixed in the dye using my rubber gloved hand for step four and it was a nice bright pink.


For step five you then add in the shorts however far you want the dye to go. I put in two pairs of shorts, one pair I'd already dip dyed purple, and a plain white one I'll dip dye another colour. Some people use hangers, I have before for a longer bucket, but this time I just draped it over the edges. 


Then you just wait for one hour for step six. You're meant to stir regularly but I haven't. I will stir next time though just to see the difference if there is any. 


After the allotted time, for step seven rinse the shorts in cold water and wring dry. You're also meant to wash in warm water but I'll do that after I've dyed my other shorts and do them all at once.


After you've washed them (which I didn't do - yet) hang them somewhere or put them somewhere safe to dry. It says to keep them away from direct heat and sunglight, so I put them on the washing line when the sun was going in and they did start to dry before it rained! So then I popped them on an old towel and put them in the bath to dry overnight! 

I hope that was helpful for you, and the last photo is how one pair of shorts has turned out. I like it, but it is a bit creased and crumpled in that picture so it does look nicer in person, as it was wet at the time. I can't wait till I've done my other shorts (I bought three dyes so that's three colour combos) and then stud them!

Sunday, 18 December 2011

DIY Personalised Christmas Stocking


Just a quick Christmas DIY, I never really thought much about setting up whilst doing it, but now I wish I had as these quick snaps annoy me! Plus I need to do them early, when its light out, but I'm mostly creative when its dark, even if that is at 5pm! Shocking! With Christmas one week away (eeeeek!) here is a cute, really simple, cheap, cute idea for how to present your presents. A DIY personalised Christmas stocking!


What you will need is plain stockings, I got mine from Tesco, something like five for a £1 or even cheaper than that. Some felt or whatever material you want to make your names out of. I used felt as that's what the stockings are made out of. I had some felt on hand in green and red, but you can buy them in a craft shop really cheaply too. You'll also need a pen or pencil for writing on the felt, some scissors and a sewing needle and thread. I couldn't find white thread, so used yellow as it's quite light, and I wanted it to contrast with the dark colours.


Write your letters and cut them out. I used a black sharpie since I was cutting the edges off anyway and wasn't worrying about black marks on the letters. I wasn't trying to be neat since I was going to cut them out, you might not feel the need to write them on first, but I wanted them roughly the same size. I'm doing these for my boyfriend, mum and three brothers, so that's a few letters of a few different names up there!


I altered the colours of each letter rather than stick to one colour, and think the dark red and green go quite nicely with the bright red.


Once you've cut out all your letters, arrange them how you like on the stocking to get a general idea of where to place them.


Then sew them on! I know this is a different name, but its the first one I finished as its the shortest! I hand sewed these on, when originally I was going to use my sewing machine. Then I realised if I used it, I would have sewn the stocking together unless I wanted to cut it open, sew on the name, then sew it back up but I think I would make that a bit messy.

Anywho! There you go! Really simple, but it does take a little  bit of time, I prepared everything, cut out the letters and sewed my mums stocking all whilst watching one episode of Glee! I'll have to finish the rest later on, seeing as I'm going to go watch Arthur Christmas finally with my friend, and I need to wrap her birthday and Christmas presents and give them to her early. Next year I want to make Christmas Stockings from scratch, and experiment with them, but I'm happy with these for this year. I've also wrapped up their presents really nicely too so they can't complain! One week! Eeeek!

Friday, 25 November 2011

Creative Mini Advent Calender


I saw on Gem Fatales blog a very cute Christmas mini advent calender DIY as one of her Tuesday Tips. You can check out how to make one in her post as I basically copied everything. She took inspiration from another post involving chewing gums instead of vitamins, but I couldn't find any to work :( I made this for my boyfriend who loves chewing gums, but! He eats really unhealthy, and I like this cute way of looking after him during winter with the vitamins ^_^


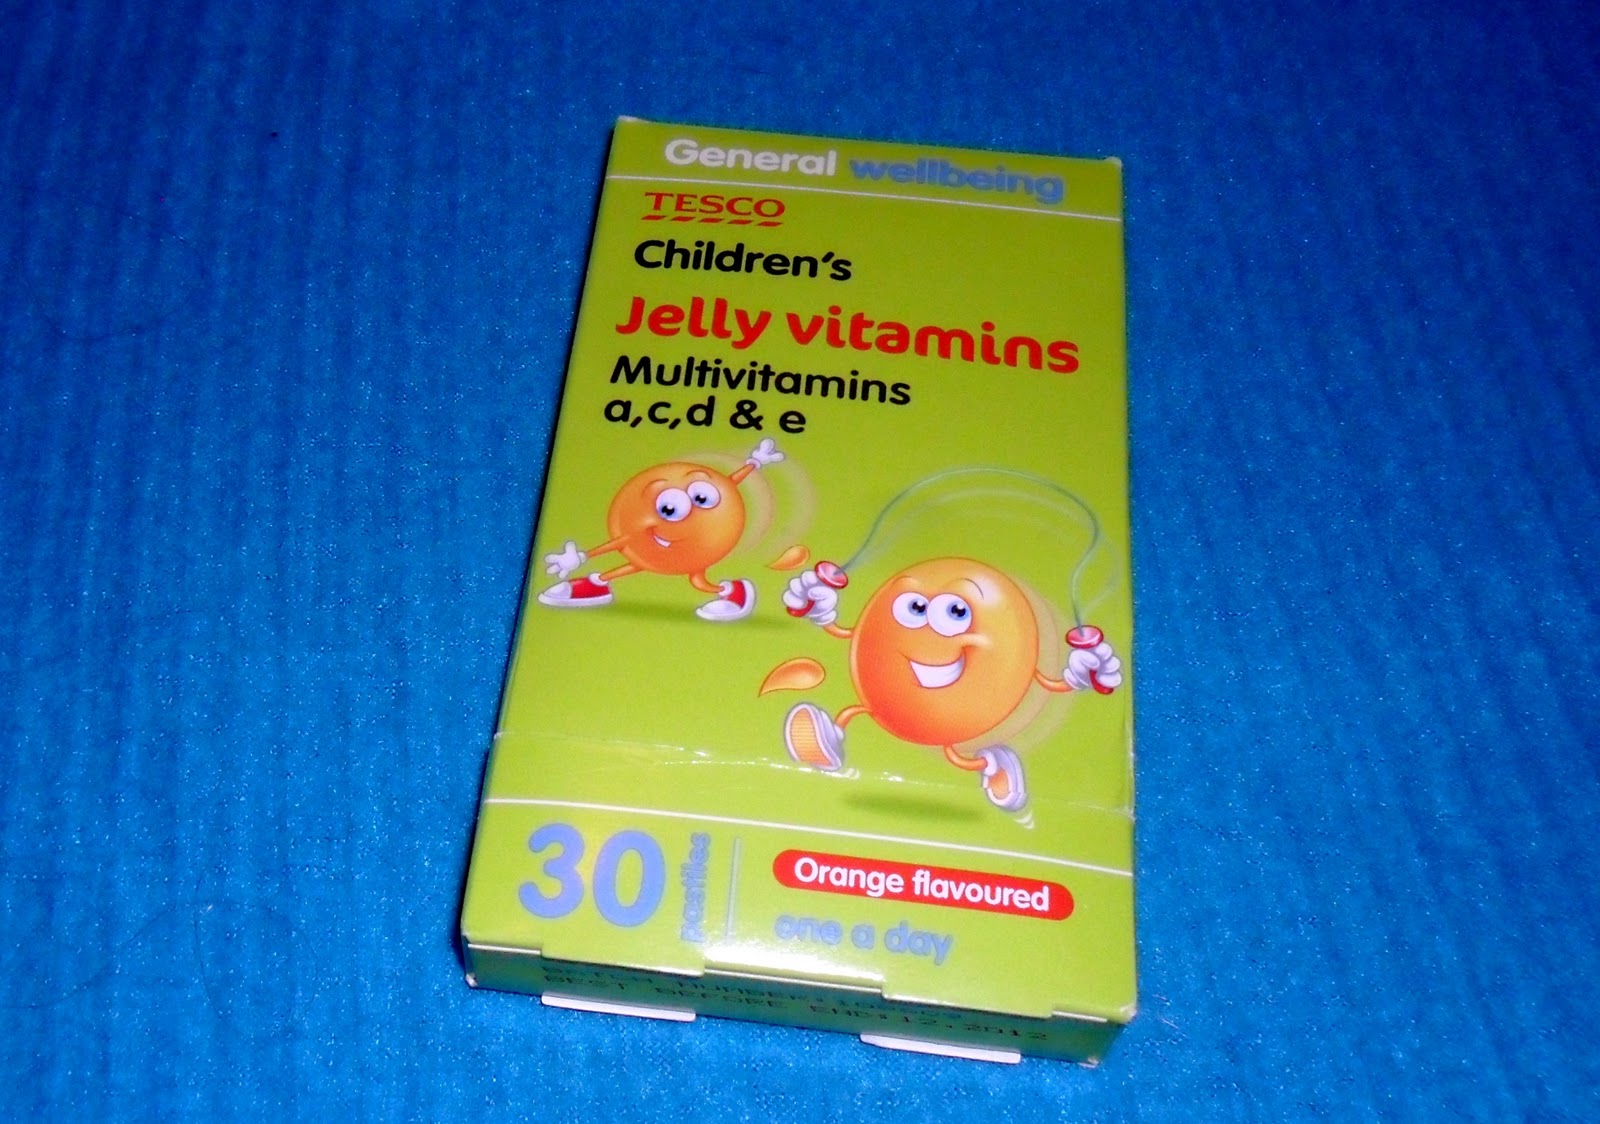
You start off with a pack like these, I'd already cut it in half by this point, since you cut off the extra vitamins, you only need 24, and then the box needs to be smaller. I love the chewy vitamins over the hard disgusting tasting ones any day! I'm a vegetarian so I take iron vitamins and some types taste horrible, bleh. Also sorry for the flash in the photos, it's dark and the lightings not very good.


As you can see, sort of, you then number the side you pop the vitamins out. I did them randomly with Sharpie Pens, but 1-12 on one pack, and 13-24 on the other pack. I cut the bottom row off each pack, and rounded the corners. The extra vitamins are now for me, which is good since I have a horrible cold atm :(


I copied Gem, and bought some stars to use as well, they are so pretty, and less than a £1 in Tesco! and drew terrible drawings of Christmas trees, stockings, presents and baubles. 


The end result! I really love brown wrapping paper, and buy it whenever I see it, so I already had this on hand, used some sticky stars and cut out Rudolph from a Christmas card. I am making cards for Christmas, but, I bought some cards for people in work since there's about 40 people there. I wrote a little note on the back, and stuck stars over the back and sides too. I might have gone a bit overboard with the stars, but they're so pretty! I hope the boy likes them, but I also bought a chocolate advent calender for him too. However he's already won the advent calender gift giving as he bought me a lego advent calender with a lego toy every day instead of chocolate, he is awesome! ^_^

P.S ONE MONTH TILL CHRISTMAS!